
Building a one-time solution for your WordPress users or clients is all well and good — whether it be a full-blown website or a WordPress theme or plugin. However, there’s a limit to how much you can achieve when your business revolves around that model.
When building things like websites, themes, or plugins for WordPress users, it’s only natural to package them up the traditional way:
“I’ll create the solution you need. You pay me $X for it.”
But this one-and-done approach isn’t really ideal for WordPress businesses in terms of sustainability or profitability nor is it going to seem very attractive to prospective customers who discover there are more comprehensive done-for-you options out there.
So, how do we solve this problem?
Answer: By turning your WordPress business into a valuable subscription solution.
This means converting your WordPress services into WaaS and WordPress products into SaaS.
Want to learn how to turn your existing services or products into a recurring revenue machine in just one hour? Keep reading.
How to Create a Recurring Revenue WordPress Business
We’ve already discussed the many benefits of selling recurring revenue solutions to WordPress users. Now, let’s make it reality:
Step 1: Decide How You Want to Productize Your Business (15 minutes)
WordPress is ripe for opportunity when it comes to packaging up services or products into a valuable subscription bundle. It’s up to you to figure out how your offering needs to evolve to do this.
To start, look at everything it is your prospective customers would have to do without you (regardless of what you sell now):
- Buy a domain name.
- Find a web hosting plan.
- Install WordPress.
- Create content for the site.
- Customize the design.
- Add contact forms, payment gateways, or other channels to convert visitors.
- Update the software.
- Manage backups.
- Monitor for security, performance, and SEO.
- Run marketing campaigns to promote the website.
- And much more.
Which part(s) of this puzzle do you currently take care of? You don’t want to stray too far from what you’re good at, what you’re passionate about, and what you’ve made a name for yourself in.
For instance, let’s say you’re a WordPress theme designer. That means you handle the following:
- Create (placeholder) content for the site.
- Customize the design.
- Add contact forms, payment gateways, or other channels to convert visitors.
Now ask yourself, with the right tools, what other parts of the puzzle could you easily add to your offering that your customers would find incredibly valuable?
With Dollie, for instance, the theme designer could add the following to their current offering:
- Find a web hosting plan.
- Install WordPress.
- Update the software.
- Manage backups.
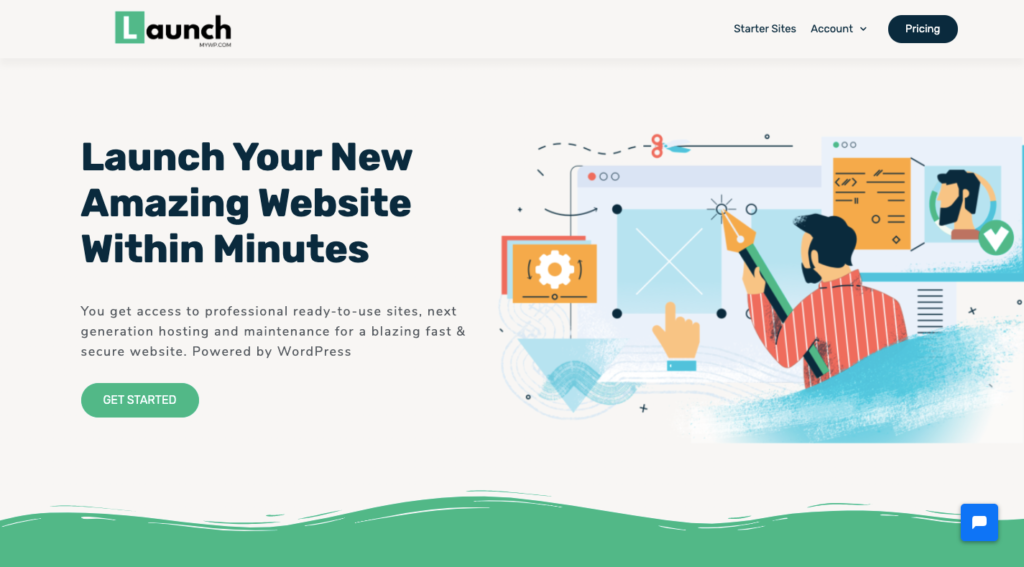
In the end, the solution could end up looking like this one from theme designer 7thQueen and LaunchMyWP:
So, think about how you can complete more of that puzzle for your customers without throwing too much extra work onto your plate.
Step 2: Price Out Your WordPress Subscriptions (15 minutes)
Assuming you already have an established WordPress business and website, your next step is to add subscription prices to it.
But how do you figure out how much to charge?
Well, let’s say you’re a theme designer who’s been selling themes on Themeforest for $59 apiece. That should be the absolute lowest you charge (per year) since that’s the value you’ve already assigned to your individual themes.
For those of you who currently build websites, let’s assume that designs go stale and need a serious refresh after two years, or 24 months. So, take the price of your websites and divide by 24. That’s going to be the lowest amount you should charge each month.
Next, do some research on how much the other services you want to tack on would cost on their own.
For example, if you wanted to take care of web hosting, WordPress installation, and backups and updates, look up the average cost of a managed cloud hosting plan (which covers all three). The kind of client that would buy a hosted, pre-built website like the one you’re selling is likely looking for cost-efficient options. So, let’s say they’d pay $15 a month for that plan.
You could add $15 to your monthly baseline price, but you might want to finagle the numbers a bit more. You might also want to create different tiers of pricing depending on how much you include in each package, how many websites are covered, etc.
One last thing: Make sure to compare your prices to your monthly costs. Can you make a profit that way? If not, you can either raise your prices or find a more cost-effective solution to sell your WaaS or SaaS solutions through.
Step 3: Sign Up for the Dollie Cloud Automation Platform (5 minutes)
Once you’ve figured out how to turn your existing products or services into as-a-service subscriptions, you need a tool that will make it predictable and profitable.
Dollie is that tool.
Of course, you could just equip your existing WordPress site with WooCommerce, a payment gateway, and upgrade your hosting plan so it can accommodate the increase in storage (to hold your product images and demos) and traffic. But the whole point in moving to this recurring revenue model is so you can do less work and make more money in the process.
For that, you’ll need something built specifically to help you automate it all.
All it takes is five minutes to become a Dollie partner. And this goes for any kind of aaS business you want to build:
- Website-as-a-service (WaaS)
- Software-as-a-service (SaaS)
- Maintenance, support, and development services
- Managed WordPress hosting
- And more
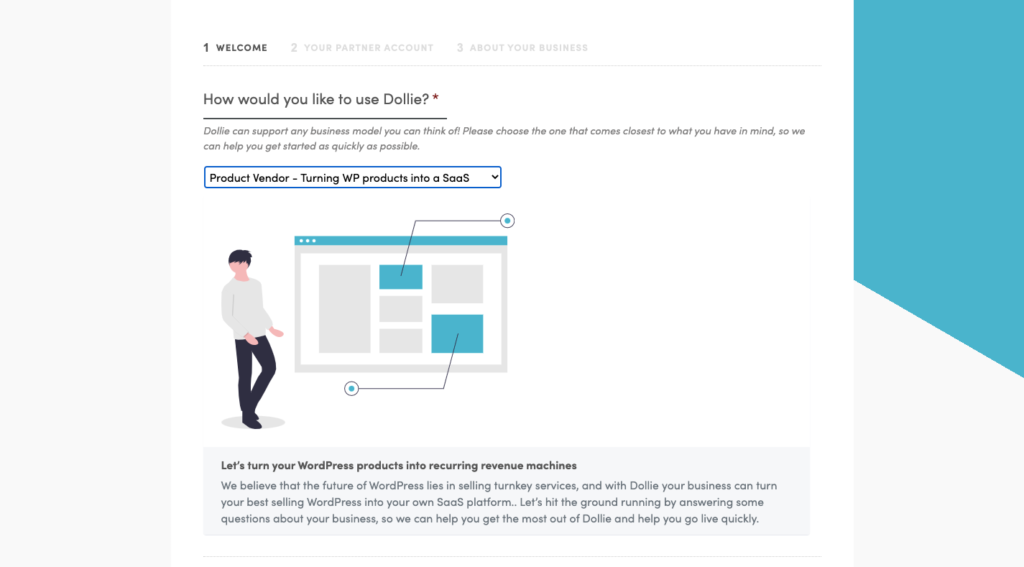
Provide Dollie with some basic information about yourself and your business. And that’s it! You’re ready to build out your new business offering.
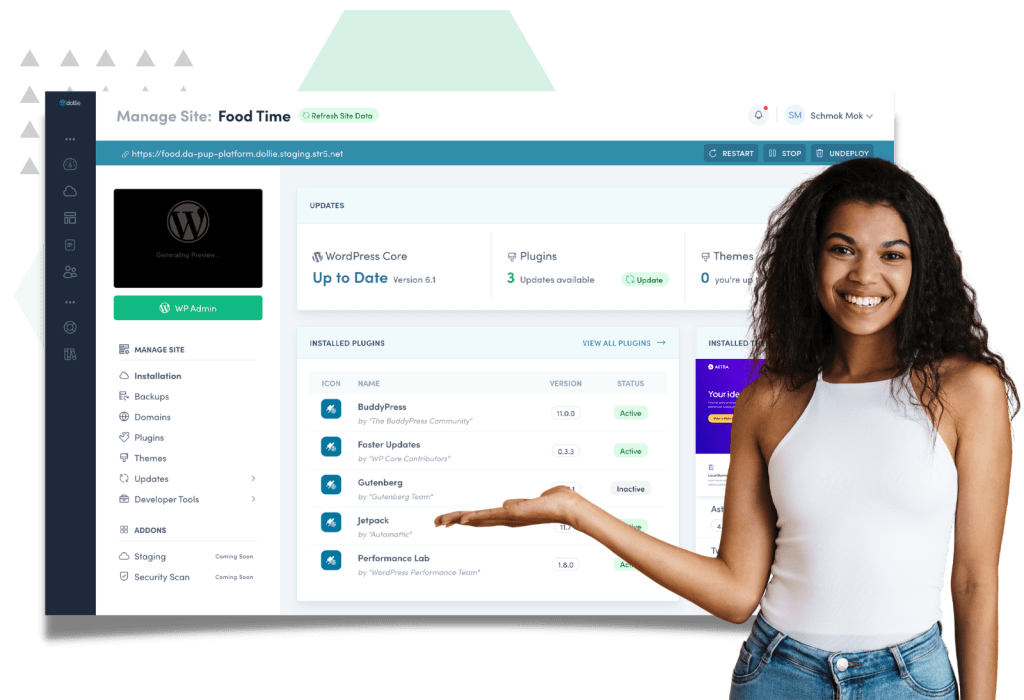
Step 4: Update Your Dollie Site (15 minutes)
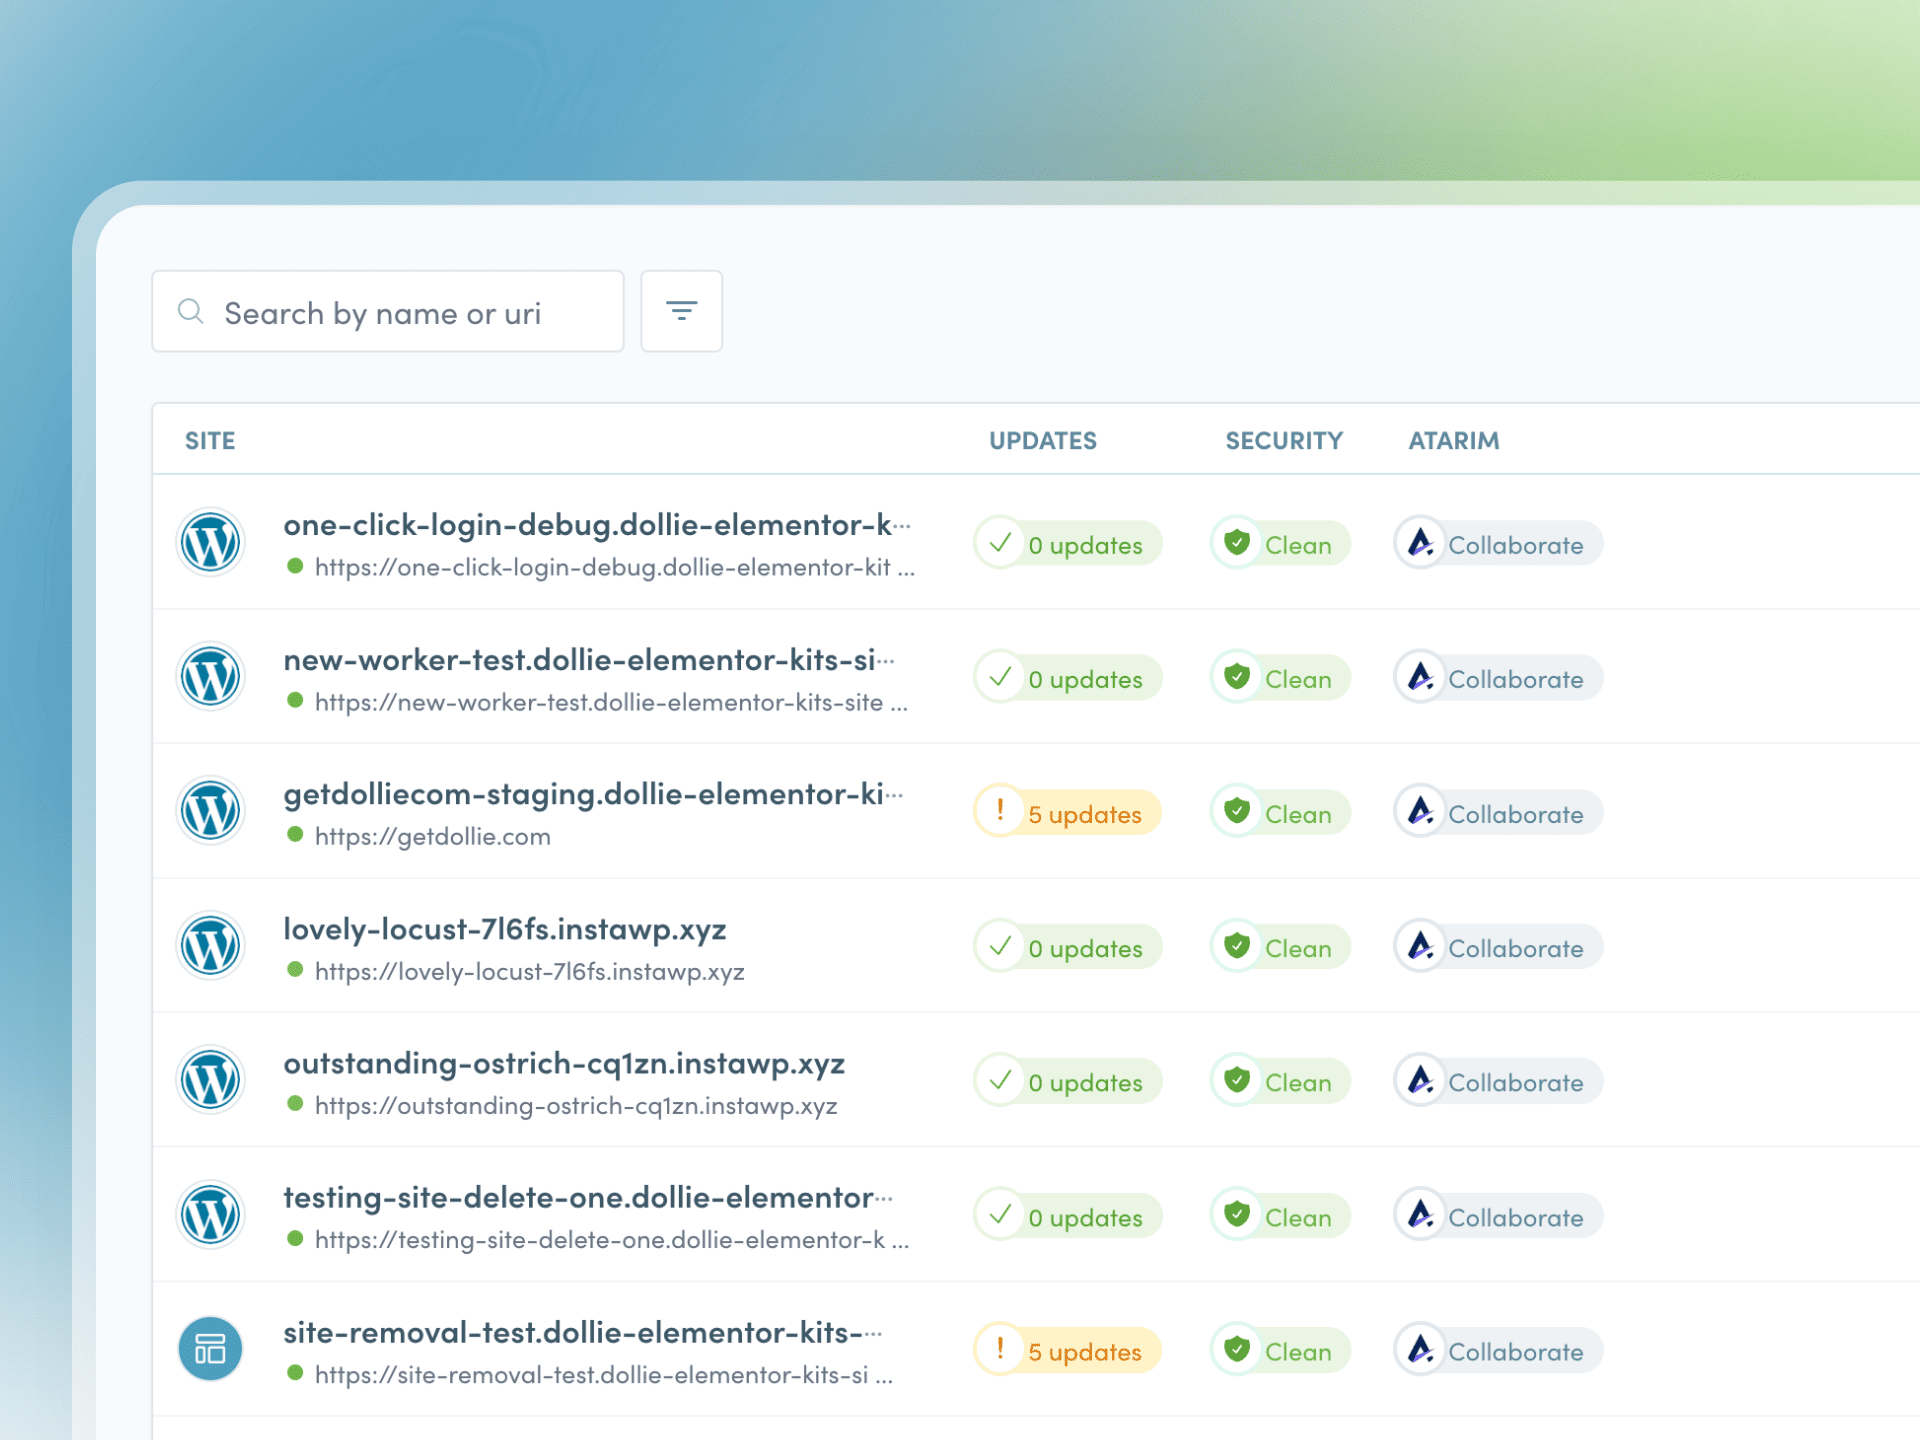
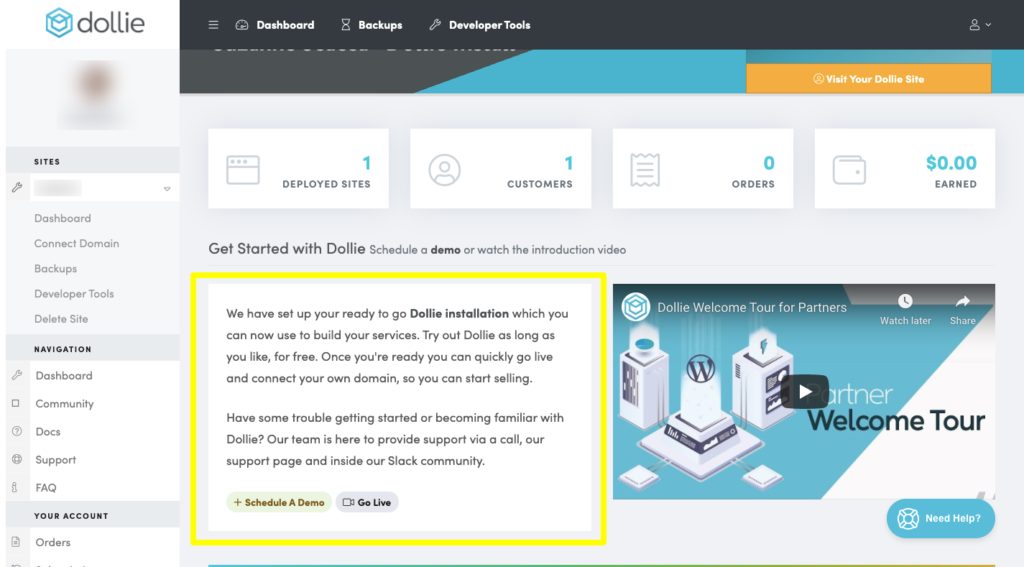
This is your Dollie dashboard:
It’s from here you’ll manage your Dollie site and its blueprints.
We’ve actually already created the Dollie site for you. If you go to your “Sites” list on the sidebar, click on your name and go to the Dashboard. You’ll find a preview and link to your new site:
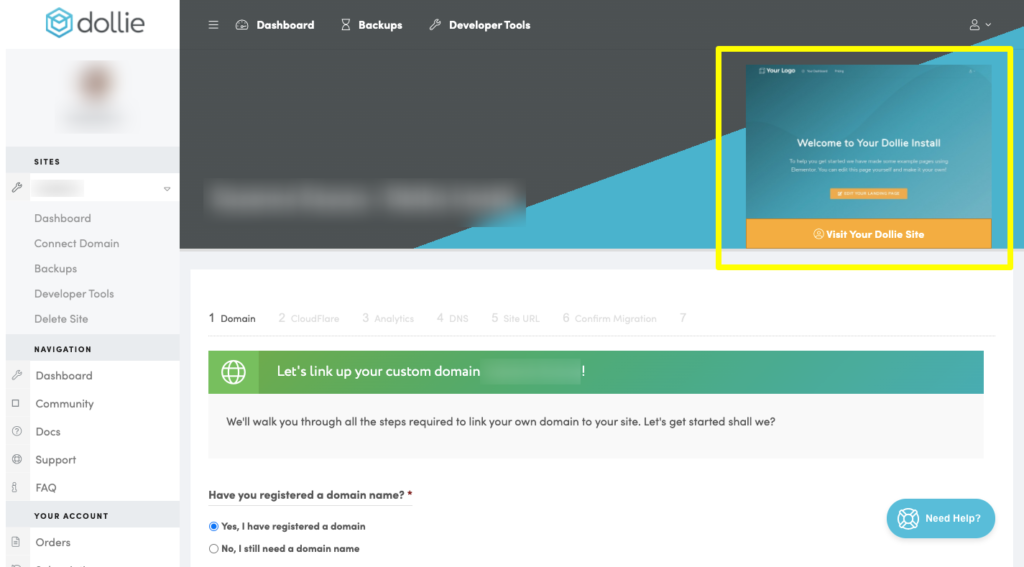
This will then log you into WordPress where you can customize your content, design, etc.
I’d also recommend you walk through the step-by-step in the Dollie dashboard:
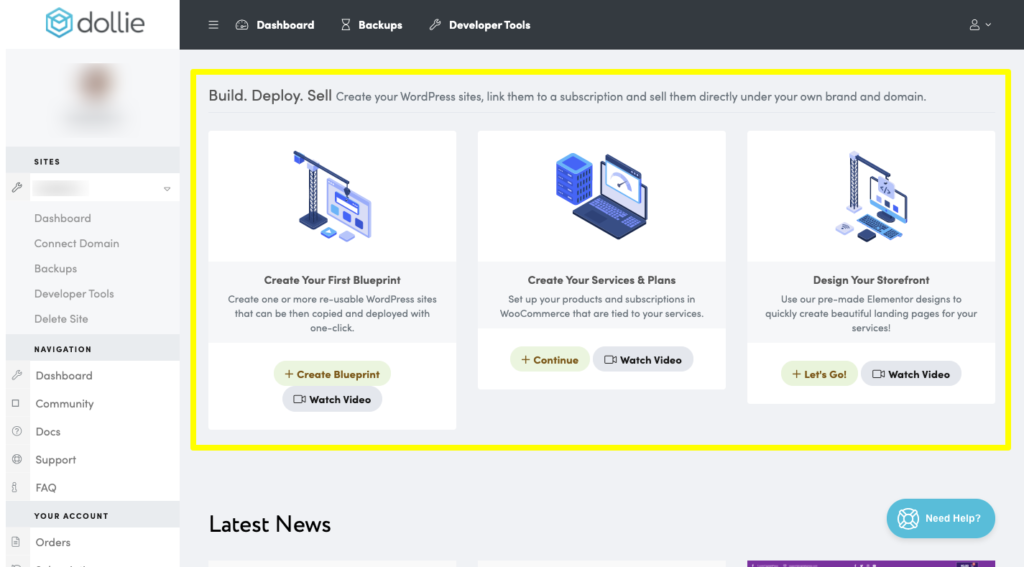
We’ve spelled out all the things you need to do to get your site and store in tip-top shape.
For those of you who have an existing WordPress site, you can go to “Connect Domain” on the sidebar and migrate your site over to the Dollie platform. That’ll save you a ton of work. All you’ll really need to do then is tweak your content so it accurately reflects your new offering and then set up a place to sell your new blueprints (products).
Step 5: Create Your WooCommerce Product Packages (10 minutes)
When Dollie created your website, it also created a number of product packages. Before moving on, take some time to review what’s been created and then edit, add, or remove the products as needed.
You’ll find them inside of your WordPress installation under Products.
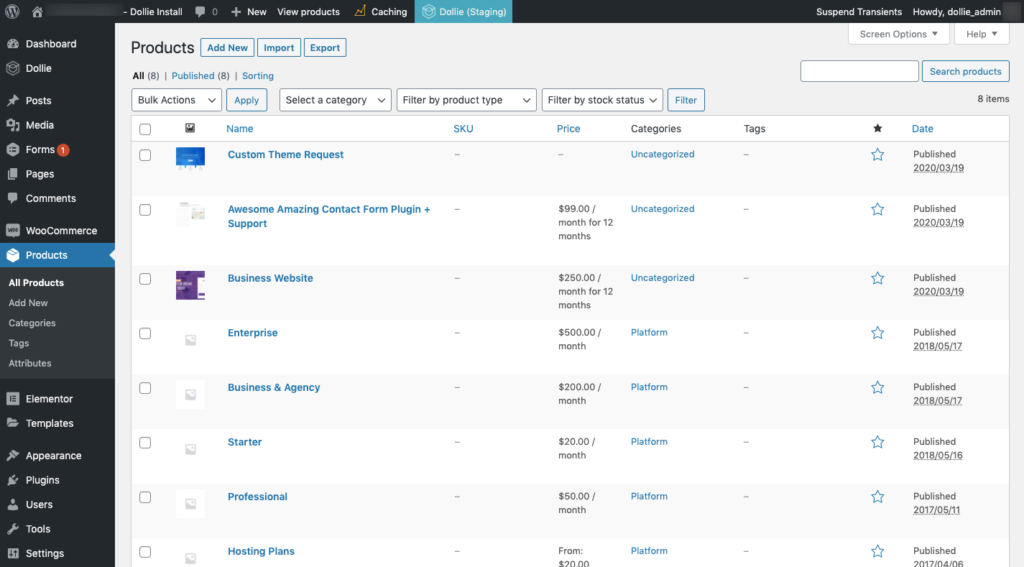
There are two kinds of things you’ll create here:
1. Product Blueprint Pricing:
If you’re selling a hosted product (like pre-built websites), you’ll create a Product solely so you can monetize your blueprints. More on that in the next step.
For now, here’s what you’ll do. Take the price you’ve set for your subscription products. Let’s say you’re going to sell your hosted sites for $50 a month. Go to your “Product” and fill in the usual WooCommerce specs — price point, product expiration, linked products, etc. And then call it something like “Pre-Built Site”.
You’ll also have additional Dollie specs to fill in, like number of sites that can be created and how much storage they can use. Unless you’re selling to designers or agencies who’ll use these products for multiple clients, the default settings should be fine.
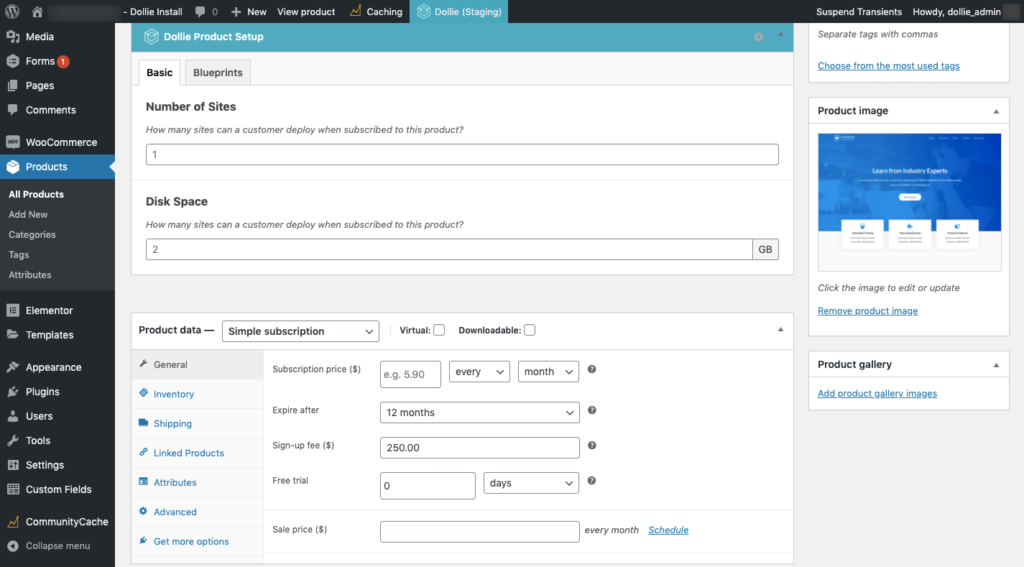
Once you begin to create your blueprints (the individual products or services for sale), you’ll have to connect them to this product, so make sure the name is descriptive and memorable. It’s also what’s going to show up in checkout when your customers buy it, so make sure it’s customer-friendly, too.
2. Subscription Service Plans:
If you’re selling a managed monthly service (like a website maintenance and support plan) that doesn’t involve setting up a new hosted WordPress site, you’ll create it as a Product as well. The main difference is that you won’t have to create a blueprint in the next step.
Instead, just fill in the WooCommerce specs under your Product.
When you’re done setting up your plans, create a Pricing page and table and connect them to these Products so that customers can sign up for the ongoing services they need.
Step 6: Set Up Your Product Blueprints (15 minutes+)
In Dollie, a container is a new WordPress installation that’s configured any way you want. So, you’ll set up one for every hosted product you sell: a pre-built site, a managed hosting plan, a supported WordPress theme or plugin, etc. Once it’s deployed to your site, it becomes a product blueprint.
To do this, go to your dashboard. Click on the “Launch” button beneath where it tells you how many sites you have. You’ll then be taken to a brand new blueprint:
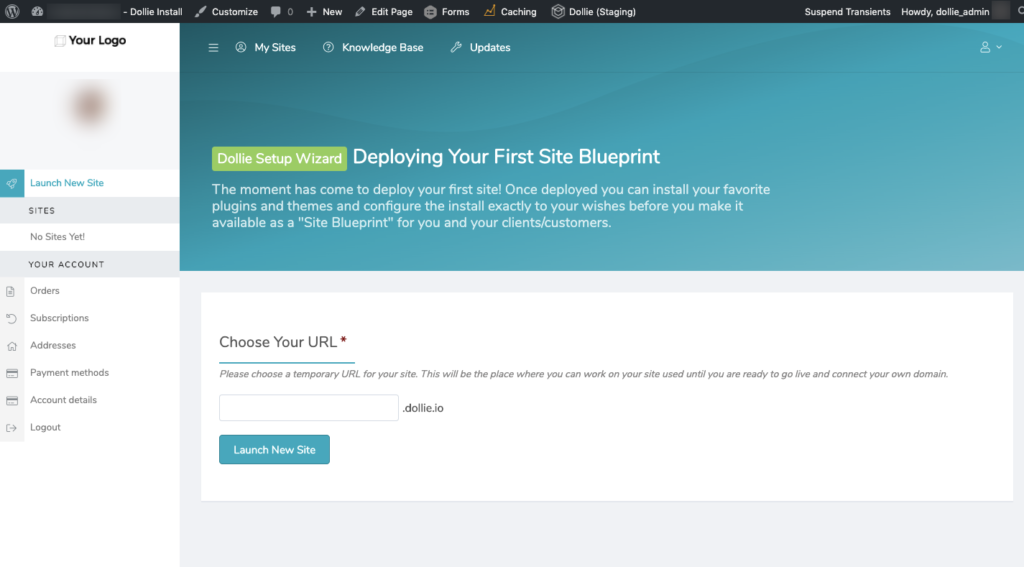
Give your blueprint a simple and descriptive URL/name. For instance, if you’re selling turnkey sites for different niches, you might create blueprints with the following URLs:
- restaurantwebsite.dollie.io
- lawfirmwebsite.dollie.io
- consultantwebsite.dollie.io
Don’t worry about the “dollie.io” bit for now. That’s just there until you move your Dollie site out of staging.
Dollie will work on creating your new blueprint and will take you to a page that looks just like the previous dashboard:
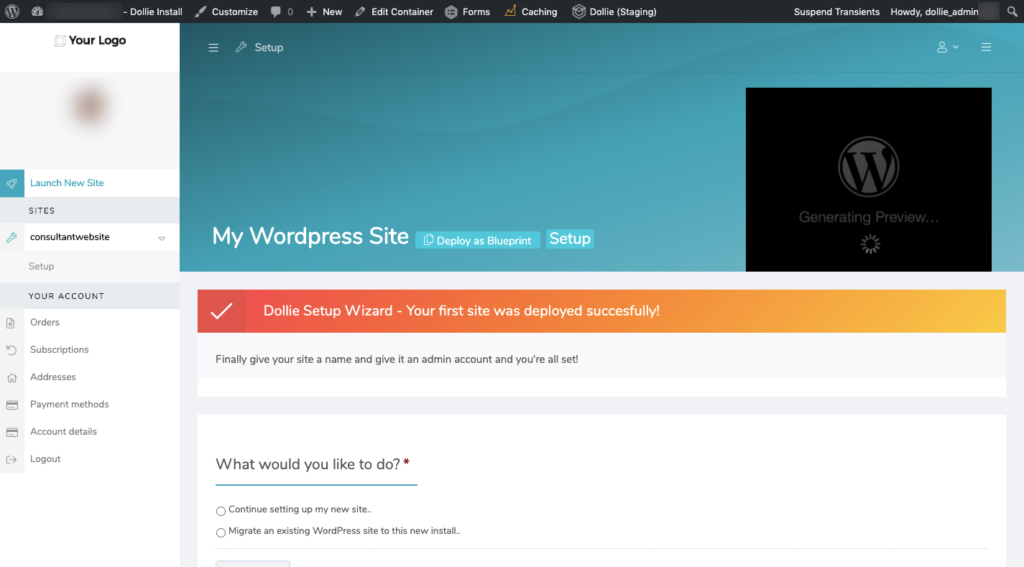
This is going to be the main dashboard for your customers, too.
Now, before you go deploying it as a blueprint, you have to set it up. Just follow the prompt on this page and it’ll walk you through what needs to be done.
Click “Continue setting up my new site.”
Update the site name and description.
Create admin login details.
Click “Finish Community Setup”.
You’ll be taken back to the dashboard where all your blueprint details will be filled in and the new WordPress installation is ready to go:
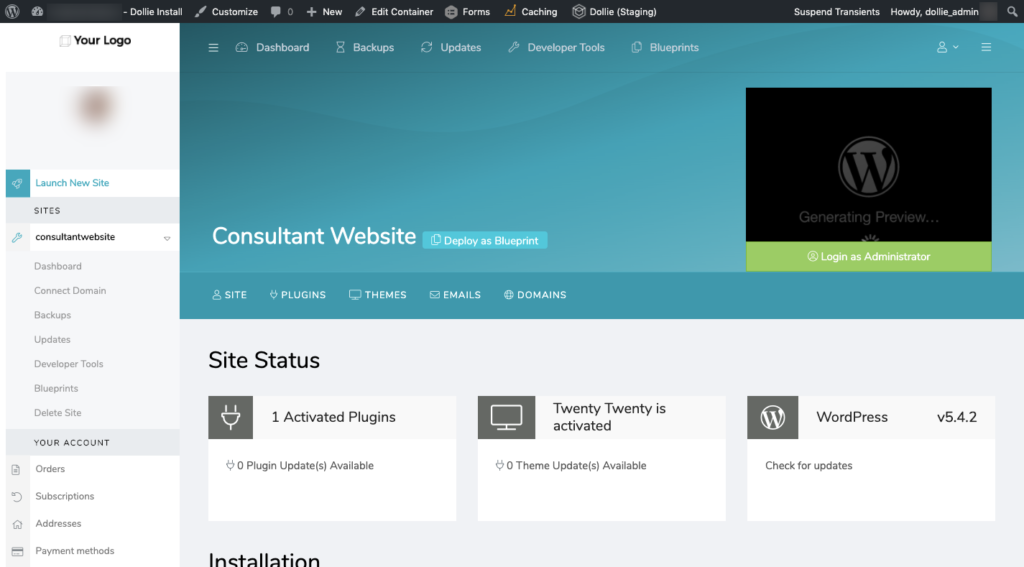
All you need to do now is log into WordPress and start creating your product. Design your pre-built site. Install your theme or plugin. Add scheduled and automated backups and software updates. You get the drift. Just try to do as much as you possibly can within the blueprint so you won’t have to worry about hand-holding any of this stuff after the subscription has been sold.
When you’re happy with what you’ve done, click “Deploy as Blueprint” next to the name of the blueprint.
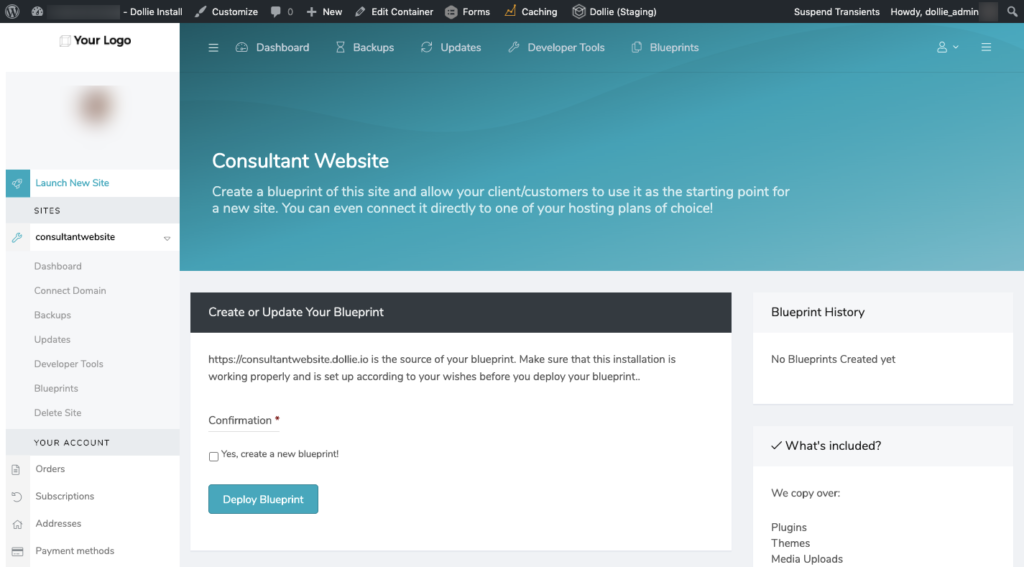
Confirm that this is what you want to do and then click “Deploy Blueprint” to turn it into a reusable product that can be sold over and over again.
On the next page, scroll down until you see your Blueprint Settings. Go to “Link to Hosting Product”.
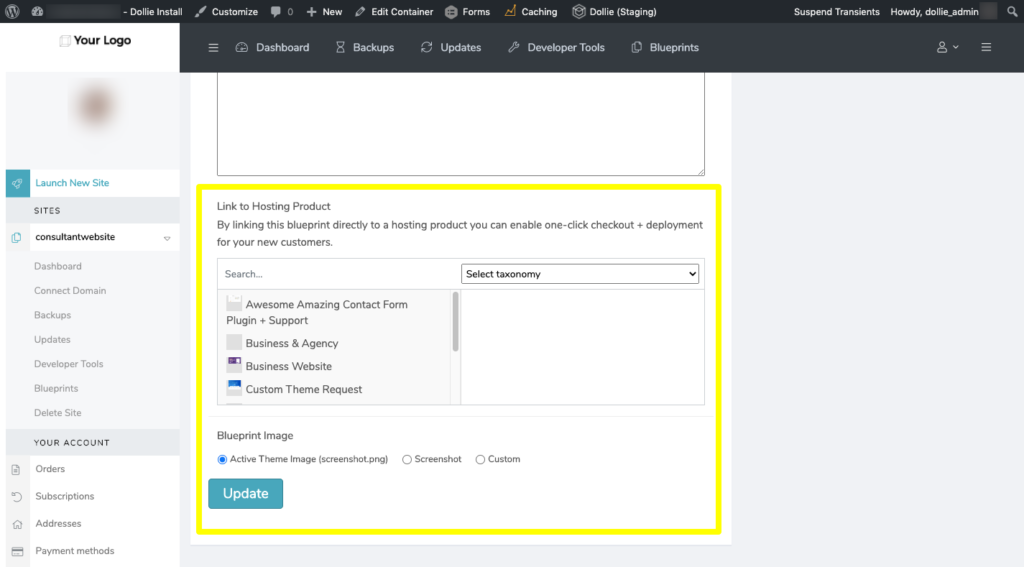
This is where you’ll connect the blueprint to one of the products/plans you previously created. This way, you don’t have to worry about processing orders and “delivering” sites or products to your customers. Everything’s connected and will take your customers through the process on their own.
Repeat this process until you’re done setting up all your blueprints.
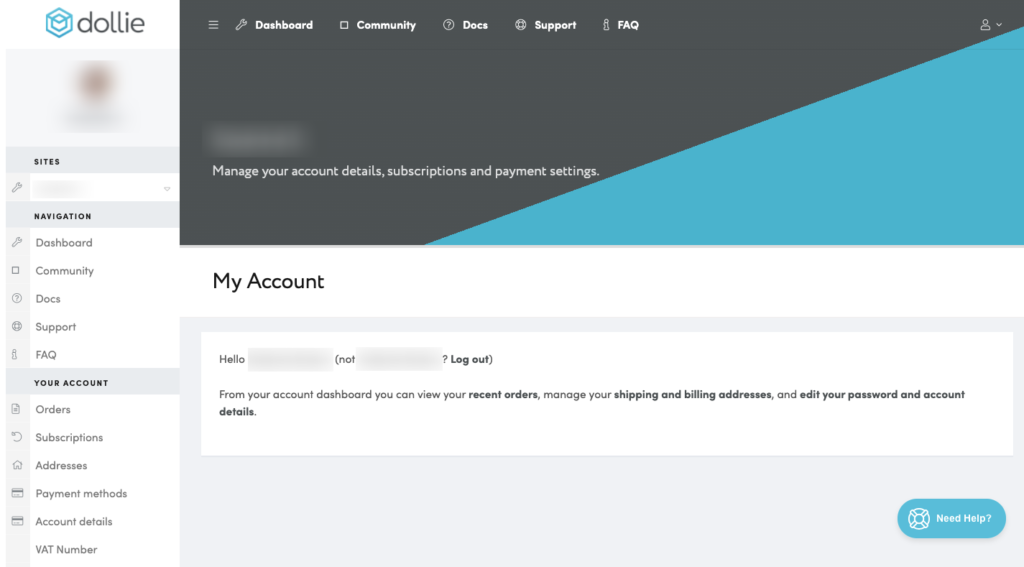
Step 7: White Label the Dollie Dashboard (15 minutes)
It’s not just your WordPress website you have to customize. You should customize your Dollie dashboard, too.
By white labeling the dashboard, you not only get to put your branding front and center, you get to streamline the onboarding process and improve their overall experience with your product by creating a more user-friendly experience.
To do this, log into WordPress and go to the Dollie — Settings menu. From here, you can adjust things like:
- Branding
- Website design and layout
- Access control
- Site blueprint demos
- Admin email information
The “Access Control” setting is especially important as this is what enables you to add or remove different fields from your customers’ view.
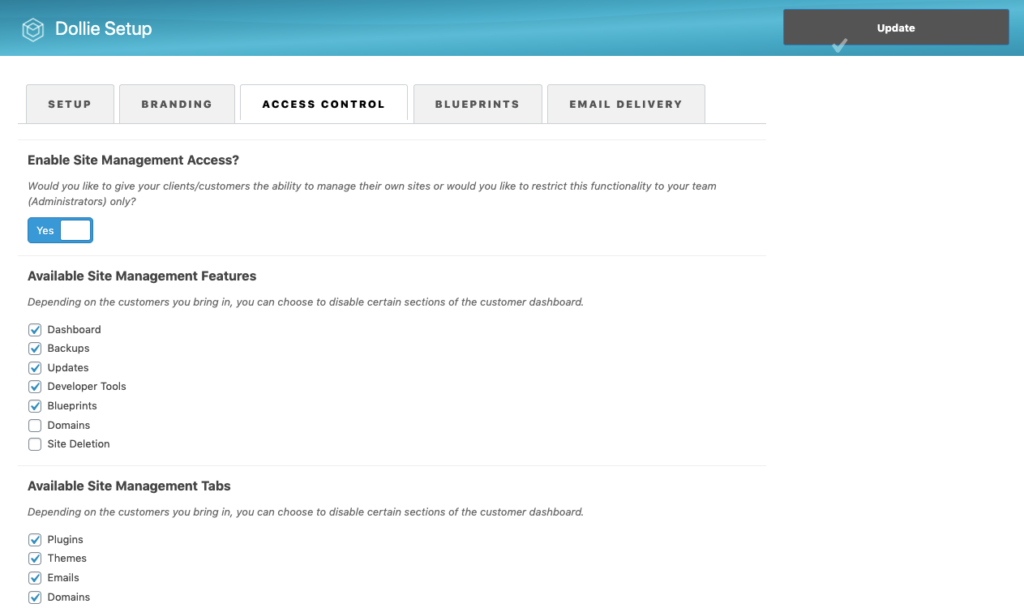
For example, if you don’t want customers to be able to see Developer Tools like WP-CLI or the Code Editor, simply uncheck that option. You might want to restrict their editing capabilities even further, disabling features like Backups and Updates, for instance (if you’re managing it for them).
It all depends on what you’ve sold them and how much you want them to do on their own (or trust them to do).
Don’t forget about your blueprints!
Another thing you can do to white label the experience is update the WordPress admin for them.
You can easily do this with the White Label CMS plugin. Just remember to install and set it up within your blueprint websites before you finish deploying them.
With White Label CMS, you get to:
- Add your company’s name to the bottom of the WordPress install along with a custom message.
- Replace the WordPress URL with your company’s in the admin bar.
- Hide the WordPress and site logo in the admin ar and replace it with your own.
- Customize the look of the WordPress login screen: logo, background, links, and text.
- Hide the dashboard panels for a cleaner, less distracting look.
- Create your own dashboard panels to welcome customers, give them tips on what to do with their site, display a video message or tutorial, or provide information on where to go for support.
- Add an RSS feed to your blog.
- Restrict access to certain menus, like Appearance, Plugins, or Tools. Or keep them from messing around with security, performance, or backup plugins you’re managing on their behalf.
- Hide various admin elements, like the Admin bar, Screen Options tab, or Nag messages when updates are available.
Here’s an example of how you might customize the WordPress admin interface and provide a more welcoming environment for your customers:
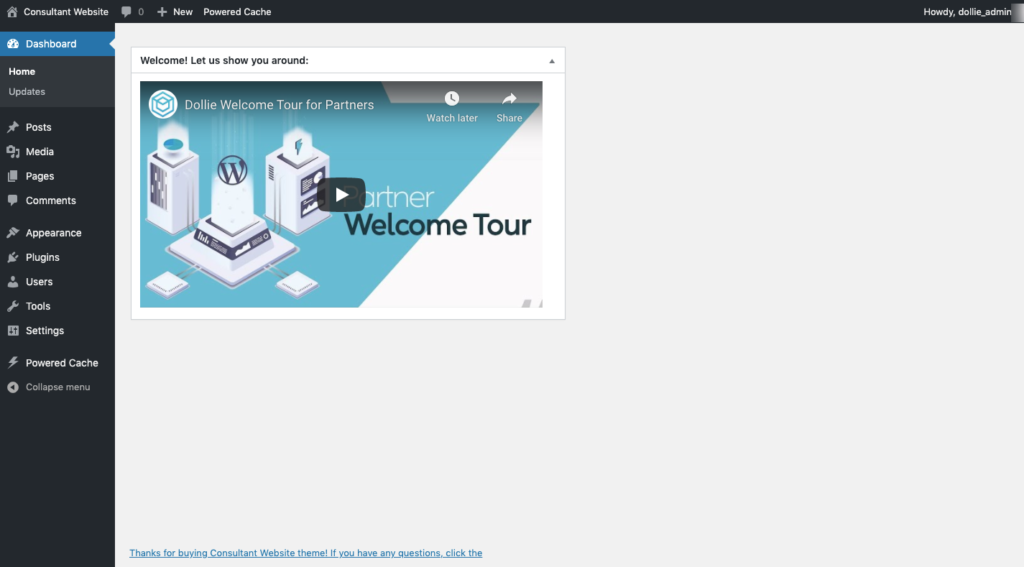
It doesn’t take very long to set up and, yet, it could save you hours every week from having to answer customer emails, handle support requests, or rush to help a customer who accidentally deleted something crucial from their site.
Step 8: Automate As Much As You Can (30 minutes+)
As far as outward appearances go, everything is all set. Your website is done. Your products are created. Your blueprints are ready to go.
But before you launch your new business, spend some time automating your processes. The more you power your website to do, the more time you’ll have to create new products, enhance existing offerings, and work on building better relationships with customers.
This step could be an entire blog post of its own, so I’ll keep it short.
As it stands right now, your website is able to give you a presence online and to sell. However, there are a number of pieces missing:
Payment Processing
WooCommerce has already been enabled for you. However, all that money you’re about to make needs to go somewhere.
Within the WooCommerce — Settings menu, you’ll need to choose your preferred payment gateway and then set up a merchant account with it, if you don’t already have one. Use the API to connect WooCommerce to the gateway and let your website automatically capture payments and get customers moving.
Customer Support
When customers run into issues or have questions, you want to be ready and available to help.
The first thing you can do is create an FAQs or Knowledgebase page on your website. This way, customers who prefer the self-help method can go there first.
You should also have a contact form on your website that enables prospective customers as well as existing ones to submit questions to you. You might also want to create a second form for support questions only.
And, better yet, you can use a helpdesk solution like Help Scout or LiveChat to streamline the whole thing. You’ll have to pay for these solutions, but it’s worth it in the long run if you can better manage support requests and keep customers happier for much longer.
SEO
Wouldn’t it be great to have people who need a pre-built site, a supported plugin, or a marketplace of beautifully designed templates find you on their own? Rather than let your site be something you always have to share a link to, optimize it for search and let Google connect you to people who are looking for and need your subscription services.
The Yoast SEO plugin is a good place to get started with SEO.
Sales & Marketing
While WooCommerce will enable you to send automated messages to customers with purchase details, that’s not enough. With a subscription offering, you’re in the business of building relationships now; not just trading X for $X.
At the very least, you’ll want to stay in touch with customers over emails to do things like:
- Inform them about product or company updates.
- Upsell or cross-sell them on related offerings.
- Check in on their experience.
- Ask for referrals.
- Provide handy tips on how to get more from their website.
The first thing you’ll need is an email marketing platform like MailChimp to import your customer email addresses into and send sales and marketing messages from. (A CRM would also be helpful.) You can then use the MailChimp for WooCommerce plugin to connect the platform to your site.
There are other things you might decide you want or need to automate as you go along. For now, focus on building out the core functionalities needed to get your business off the ground. Then, add to them when you have the time and a valid reason to do so.
Step 9: Launch Your New Recurring Revenue Machine! (5 minutes)
The very last step is simple:
Launch your recurring revenue machine and watch the sales start to roll in!
To do this, go to your Dollie dashboard and scroll to the first section here:
Click “Go Live”.
We’re going to ask you just a few more questions about your business, your familiarity with managing WordPress websites, and so on. Click “Submit Business Info” and then let us take it from there.
Once we’ve made sure everything is in good working order, we’ll help you get your new site online!